Friday, February 25, 2011

Spicy Pepper Jack Mac and Cheese with Almond Breaded Pork Chops


Inspiration is everywhere. You can even steal inspiration from other people. For example, I decided I had to make pepper jack mac and cheese while waiting in the line at the grocery store. The lady in front of me was giving whoever was on the other end of her cell phone ideas on how to jazz up traditional macaroni. I couldn’t help but overhear the conversation. She made some pretty decent suggestions like adding crab, broccoli, or blue cheese. But she really caught my attention with, “How about using pepper jack cheese? Make it spicy?” She goes on to mention a few other ideas that I can’t recall and eventually the conversation fads back to another topic, but the pepper jack cheese idea sticks with me. I am usually so conventional with my mac and cheese (colby, straight up), but what if… I couldn’t get the idea out of my head. I was already in the check-out line, so it would have been pretty ridiculous to get out of line to go buy the ingredients for the dish right then and there- right? haha… Right.

As for the main course, I decided on pork chops breaded in almond flour. Wheat flour is not allowed on Ed’s Paleolithic diet, so I have been using a lot of almond flour recently, which is fun and different but pretty darn expensive. One 16oz package of Bob's Red Mill Almond Flour costs about $12 (yeah, ouch). Additionally, I realize serving cheese-ridden wheat macaroni pretty much negates the entire paleo diet effort, but, after all, marriage is about compromise. 


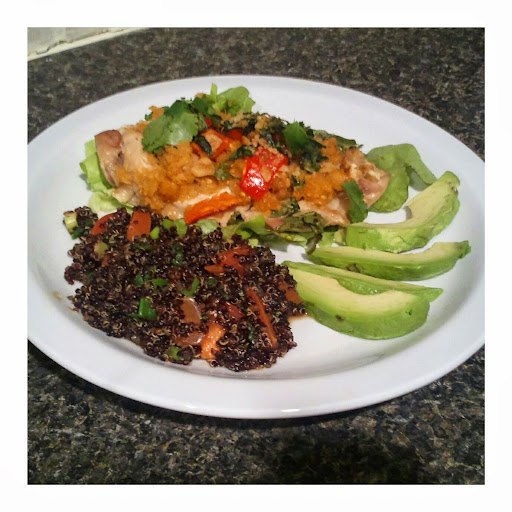
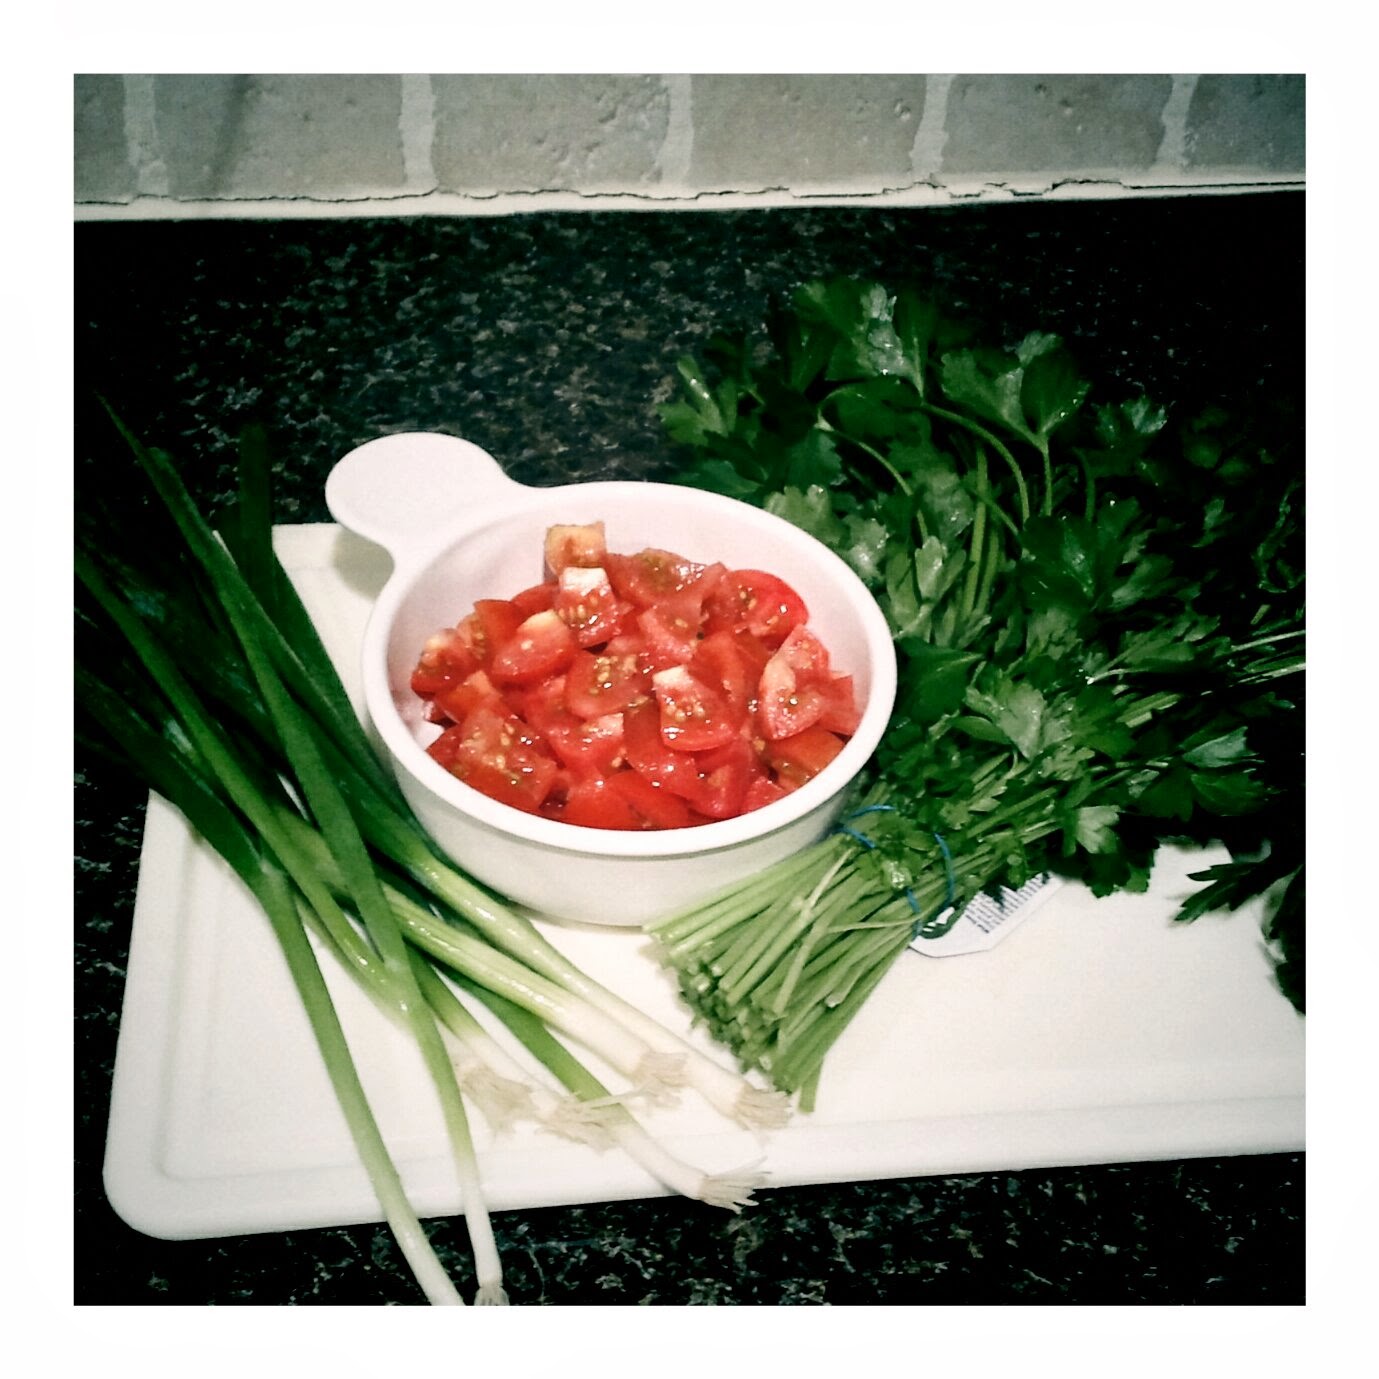
To serve on the pork chop, I made a quick cilantro, green onion, olive oil, and balsamic vinegar dressing. I also served up some grilled vegetables, carrots and broccoli, just what I had on hand. I left the veggies on the grill for a few minutes on each side and served them plain alongside the mac and cheese and pork chops. 


So, below is our idea of a happy medium. Hopefully, even if you don’t make these exact same recipes, you will be influenced by my stolen inspiration to serve up a little compromise of your own. 


Pepper Jack Mac and Cheese Ingredients
1 cup Elbow Macaroni
¼ cup Butter
 3 tbsp Flour
1/8 tsp Dry Mustard
2 cups Milk
1 cup Pepper Jack Cheese
1 cup Colby Jack Cheese
1 cup Toasted Bread
2 tbsp Olive Oil
Salt and pepper
Chili Powder

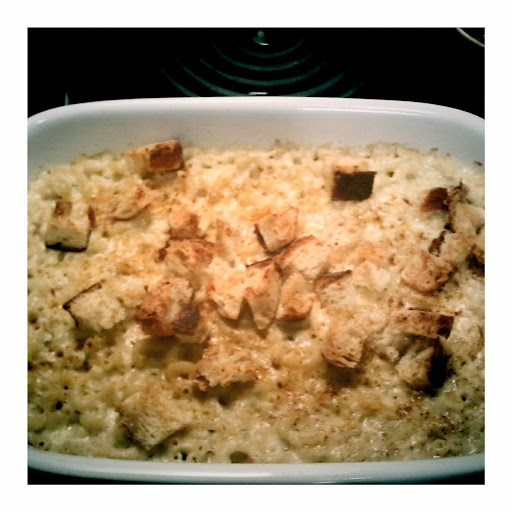
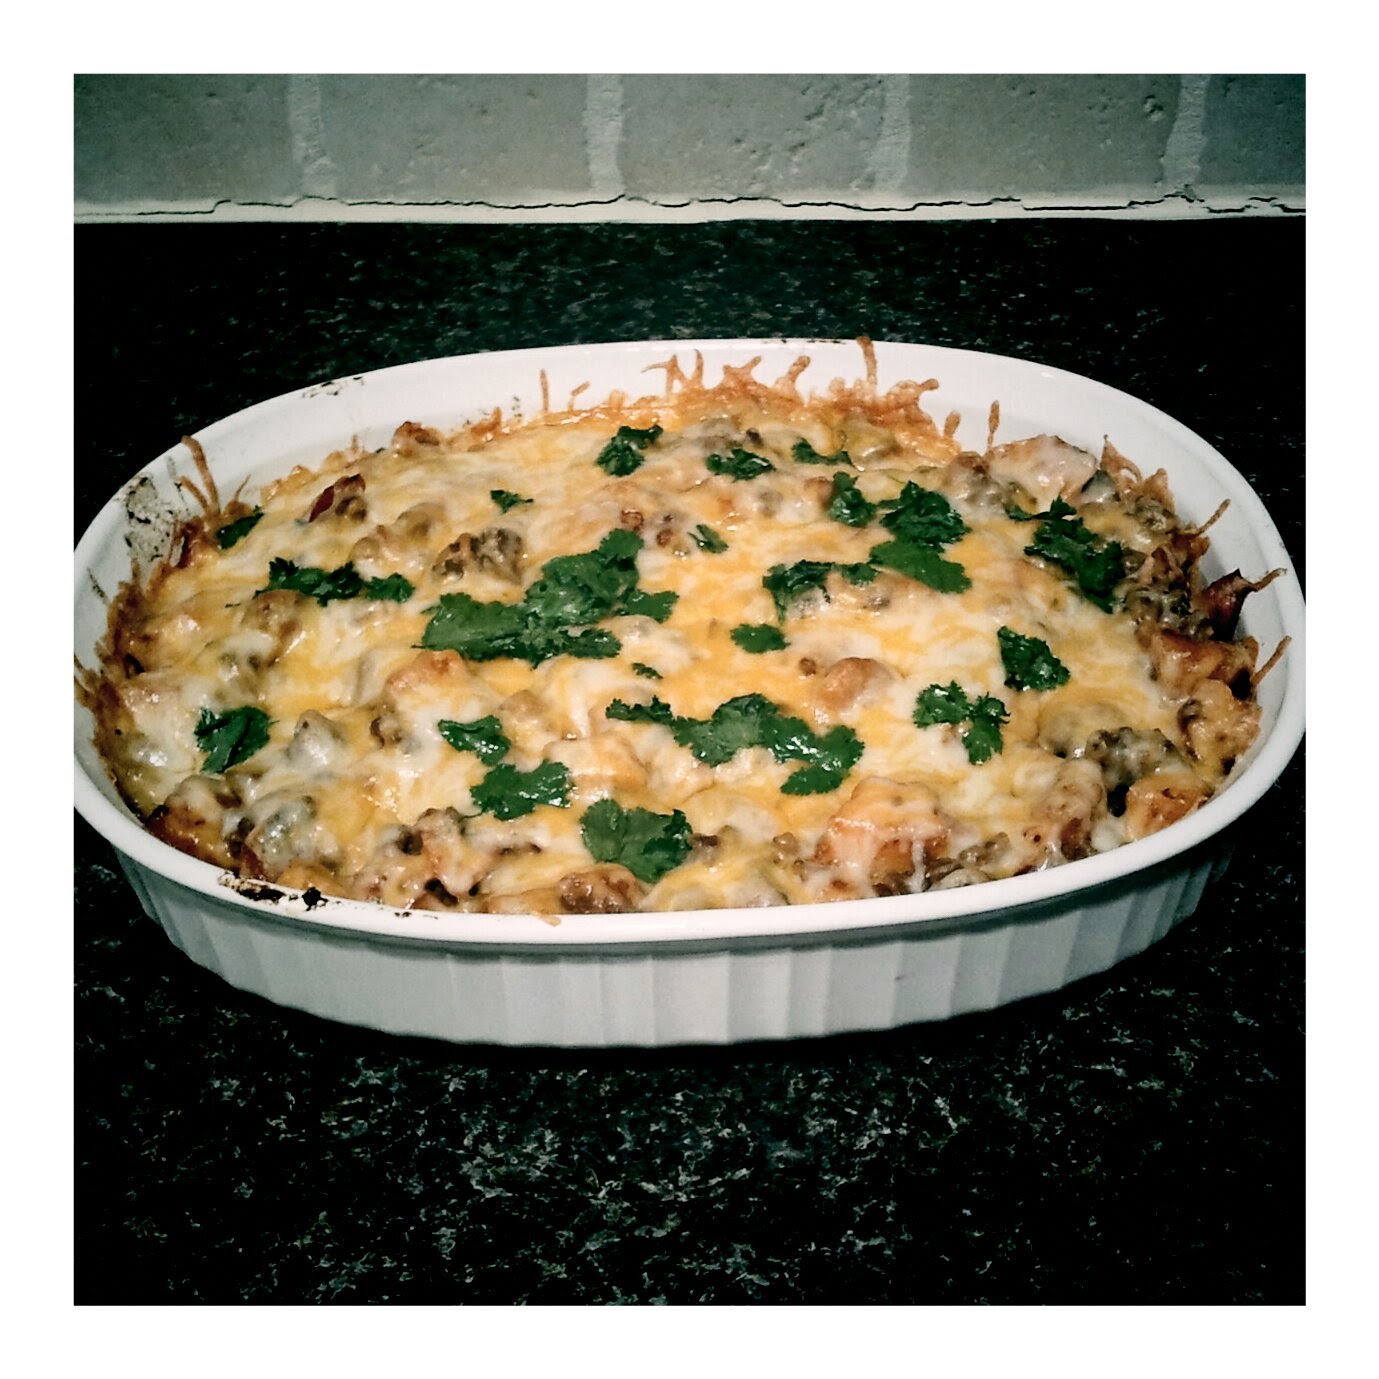
Pepper Jack Mac and Cheese Directions
(To get the quantities right, I used the directions from the back of the macaroni box). Preheat the oven to 350. Cook elbow macaroni per the directions on the box. While the macaroni is cooking, melt the butter in a large saucepan, then add the flour, mustard, salt and pepper. Cook the flour mixture until it is bubbly. Gradually add in the milk. Continue to stir the mixture until it starts to boil. After the mixture starts to boil, add the different types of cheese stirring continuously until all of the cheese is melted and the mixture is smooth. Then leave it simmer while you drain the water from the pasta. Then add the pasta to the cheese mixture. Carefully mix it all together and then transfer the mac and cheese to an oven safe casserole dish. Optionally, you can add a bit of crunch on top by taking some toast cut into small squares and mix in a bowl with some olive oil and then place the toasted bread on top. Finally, sprinkle the mac and cheese with chili powder. Bake in the oven about 25 minutes.

Almond Breaded Pork Chops
2 Pork Chops
1 cup of Almond Flour
1 egg
1-2 tbsp of your favorite dried seasonings from your kitchen (I used oregano, basil, and garlic powder)
Salt and pepper

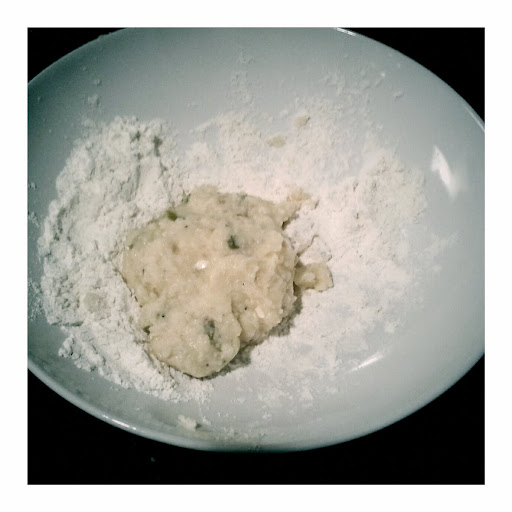
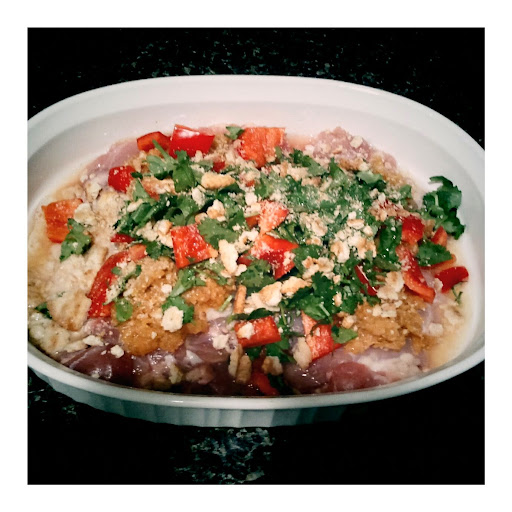
Almond Breaded Pork Chops Recipe
Pre heat oven to 425F. Pound pork chops with a meat tenderizer. Beat one egg in a small bowl. In a separate bowl, mix together the almond flour, salt, pepper, and desired dried herbs. Dip the meat in the egg and then dip it in the flour mixture covering the pork chop completely. Carefully place the floured pork chops in a greased oven safe dish. Then, I drizzled the top of the pork chops with a little bit of olive oil. Cook the chops for around 30 minutes or until they reach the internal temperature of 160F. 

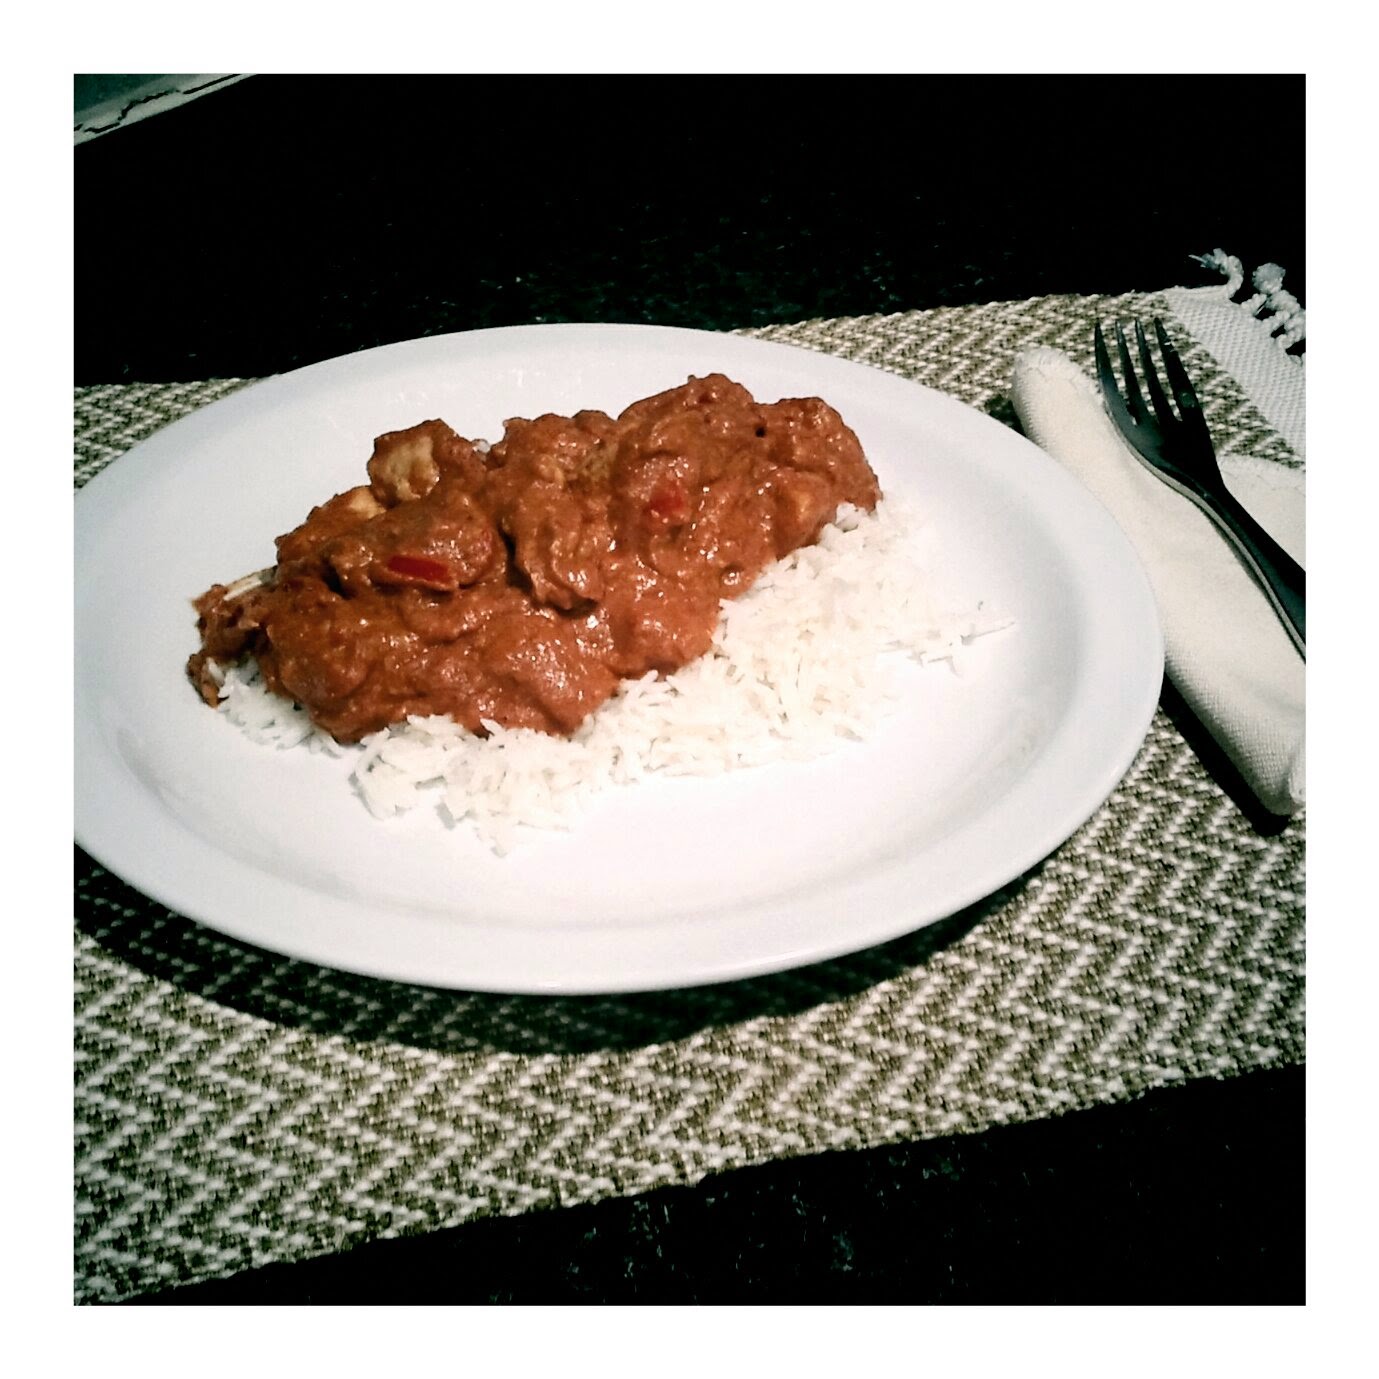
Ed's Verdict: Ed really loved the pepper jack mac and cheese. He thought that the little bit of spice was just right. "It's the way mac and cheese should always taste". As for the pork chop, he had a hard time getting past the dressing. He majorly dislikes balsamic vinegar. I know this. Normally I can disguise the taste enough among other ingredients that he doesn't really notice it, but I guess I used a little too much with this dressing. He did love the pork chop, though (after he scraped off half of the dressing!) Yes, compromise indeed.


Wednesday, February 23, 2011

Nutella S'more Gelato Sundae

I met up with some girlfriends last weekend at We the Pizza in Capitol Hill in order to find some good conversation, yum pizza, and perhaps catch a glimpse of the owner, Top Chef star Spike Mendelsohn. We ordered four different kinds, Forest Shroomin, The White Pie, The Spinach and Artichoke, and The Fresh Buffalo Mozz and Roasted Tomato. I preferred the latter, as The Fresh Buffalo Mozz and Roasted Tomato tasted most similar to the classic pizza that I was craving. Although it is difficult to compare We the Pizza to the frequently found gourmet pizzas in the city, we agreed that it was one of the best New York style pizzas around. 

But, as you may have guessed from the title, this post is not a restaurant review or about pizza. One of the main reasons that I wanted to check out We the Pizza was to taste a stand out item from their dessert menu (yes, I frequently base my restaurant choices on the dessert options). Clearly printed on their online menu is a Nutella S’mores Gelato. So, you can understand my frustration when it got around to dessert time, and the staff informed me that the dessert was no more. Outraged at the false advertisement, I had to settle on a black and white milk shake that was awesome, yet so full of fudge I could barely suck the drink through the straw.

Dissatisfied and unsated, I did what any chocoholic female with a craving and a food blog would do, I hightailed it to the nearest grocery store and bought all of the ingredients necessary to make my own version at home. So, I give full credit where credit is due. But just for the record- although this is not my original recipe, unlike We the Pizza, my kitchen actually delivered on the goods. Below is the indulgent result!

Ingredients
Graham Crackers
Nutella
Marshmallow Fluff (I fully admit that I bought Marshmallow Fluff instead of real marshmallows because the jar was cute)
Vanilla Gelato

Directions
Do I really need to explain this? Well, first, place a couple of scoops of the gelato in the bottom of a bowl. Next, add a couple spoonfuls of nutella (yes, a couple of spoonfuls). Then add an equal amount of the marshmallow fluff. Finally, add crushed graham crackers on top and enjoy!


Ed's Verdict: I made both Ed and I an ad nauseum quantity of this dessert. I was unable to eat it all.  It was gratifying yet borderline gluttonous. Ed, however, had no problem finishing the whole thing. A big  gelato fan, it reminded him of his freshman year of college when he was on that ice cream kick and gained a little too much weight around the middle... (whatever!)

Tuesday, February 22, 2011

Vegetable Mai Fun with Balsamic Molasses Sauce

This Balsamic Molasses Sauce has quickly become a favorite in my kitchen. The original recipe came from one of my favorite online cookery blogs, Gluten Free Goddess. I have enjoyed every recipe that I have made from her site. This sauce and much of my recipe is a variation of her Turkey Meatball Asian Noodles, a dish that was originally inspired by an episode of Jaime Oliver's Food Revolution. However, my recipe is ultimately different and, of course, influenced by the vegetables from my WGG box. In lieu of turkey meatballs, I decided to go vegetarian and use a  mushroom and red pepper base. For the noodles, in order to make Ed feel better about partaking in a carbohydrate dish, I picked up a box of gluten free brown rice mai fun. But the sauce is what makes the dish. It's an unlikely combination of black strap molasses and balsamic vinegar. The first time I made it, I was unsure of how it would taste and if Ed (or I) was going to like it, but it turned out fabulous. Now I keep the basic molasses/balsamic vinegar sauce the same and  alternate the veggies, chicken,  tofu, etc and various noodle types based on what we are in the mood to eat.

Ingredients
1 Red Pepper, sliced
2 stalks Green Onions, diced
1 pint of Mushrooms
1 tsp of Garlic, diced
1 tsp of Ginger, paste
1 Egg (or tofu equivalent)
3 tbsp Black Strap Molasses
2 tbsp Balsamic Vinegar
1 bunch of fresh Parsley, chopped
1 bunch of fresh Mint, chopped
1 bunch of fresh Cilantro, chopped
1 box of Mai Fun Noodles (Brown Rice Angel Hair Pasta)
1 tsp Sesame Oil
Directions
Drizzle a tablespoon of olive oil into a saute pan. Add green onions, garlic, ginger, mushrooms, and red pepper. Stir fry veggies until they are tender. Then add the egg and stir it in to the veggies. Once the egg is fully cooked, add the molasses and vinegar and stir until veggies are coated with the sauce. Reduce heat and simmer. Meanwhile, prepare the noodles according to the box instructions. These Mai Fun noodles cooked in only 2-3 minutes. When they are done cooking, drain the noodles and return them to their pot. I then stirred in a bit of sesame oil to keep the noodles from sticking. Before serving the dish, add the fresh cilantro, mint, and parsley to the saute pan and stir the greens around for a minute or two until they become tender. Serve the vegetables over the noodles.

Ed's Verdict: Coming from an austere meat eater, Ed was less than impressed with the vegetarian version of this dish. "It was lacking meat", he caviled. However, I made the EXACT SAME DISH a couple of weeks ago with chicken instead of mushrooms, and he loved it. Silly.


Monday, February 21, 2011

Go Green! Green Bean Salad with Avocado Dressing

When we start to get towards the end of the Washington's Green Grocer box, I have to get creative with our dinner options. Last evening, we still had an entire bag of green beans, a head of red leaf lettuce, and one very ripe avocado. Ed wasn't very hungry (as usual- Colombians notoriously don't eat dinner) and thus a green bean salad was born. It's a very green recipe, greenish-colored lettuce, green beans, and green avocados, but it was very satisfying. Since there are only a few ingredients, it doesn't take very long to prepare. And if you date an American man that actually likes to eat dinner, I bet this would make a good  accompaniment to any main course.

Ingredients
1 bunch Red Leaf Lettuce
Fresh Green Beans
2-3 Roma Tomatoes, sliced
2 stalks of Green Onions, diced
1 tsp Garlic, diced
1 drizzle Olive Oil
Avocado, ripe
Fresh Cilantro, chopped
1 tbsp Lemon Juice
1/2 tsp Salt

Directions
Wash and snap green beans. Place green beans in a saute pan with olive oil, garlic, and green onions. Saute until tender. Wash and cut lettuce and place into a salad bowl. Let green beans cool slightly before tossing in with the lettuce. For the avocado dressing, use a ripe avocado. Peel and pit avocado and place into a bowl, smash it up using a fork and add the cilantro, lemon juice, and salt. Mix together. It should be slightly more liquid than guacamole. Add dressing to the top of the salad.


Ed's Verdict: Says it was fantastic and crunchy. One of the best green things he has ever eaten.

Wednesday, February 16, 2011

Leftover Mashed Potato Pancakes with Spicy Yogurt Cilantro Dressing


So, remember the other day when I made those delicious Yogurt Mustard Mashed Potatoes? (Have you tried to make them yet?) Well, it seems that I made a few too many, and we had some leftovers. With Ed around, leftovers are rare, but, alas, here we are. I didn't just want to heat them and eat them. I wanted to turn them into something different and create an entirely new dish. Enter Mashed Potato Pancakes. This recipe is so easy and gives new life to a leftover meal. To give it a little more piquancy, I served it with a spicy yogurt cilantro dressing.

Leftover Mashed Potatoes Ingredients
Leftover Mashed Potatoes (However much you have! Preferably at least 2 cups)
1 egg
Flour
Oil


Leftover Mashed Potatoes Directions
Beat one egg into 2 cups of leftover mashed potatoes. Form into patties and flour both sides. Then drop patty into hot oil and cook for a few minutes on each side and voila!


Yogurt Cilantro Dressing Ingredients
1/2 cup of plain yogurt
1/2 cup of cilantro
dash of chili powder
salt and pepper


Yogurt Cilantro Dressing Directions
Mix all ingredients together and serve with mashed potato pancakes.

Ed's Verdict: He said, "Wow! this is a lot better than i expected. I was only going to have one, but I will have another. The yogurt cilantro dressing goes really well with it."

Tuesday, February 15, 2011

Grilled Flank Steak with Yogurt Mustard Mashed Potatoes


Some recipes are born out of necessity. My Yogurt Mustard Mashed Potatoes fall into that category. These are mashed potatoes with everything. Cheese, onions, garlic, crackers, and even a little stone ground mustard. I normally use whole milk when I make mashed potatoes, but we had inconveniently ran out, and I didn't realize it until I already had my mixer in my hand. I scoured the fridge... Rice milk- no. Almond milk- maybe. Organic non-fat plain yogurt- hmmm, yes! I had no idea what it would taste like. Thanks to my phone, i checked online and learned that others had successfully accomplished this mash up before. Perfect. My mashed potatoes were saved!

As for the mustard, I felt like adding a little zing to the typically bland spud. Even with the addition of cheese and garlic, mashed potatoes can still fall short of flavorful (especially for my not so potato-loving husband). So I needed something that would add a little pizazz.

I want to note that I did NOT use a regular "hot dog style" bright yellow mustard but a gourmet, "chichi" stone ground mustard. I do think this is an important distinction to make. Unless you want to go a completely different route- "French's Mustard, Grilled Hot Dog Mashed Potatoes" for example- but that takes us down a road I'm not quite sure I'm willing to take. (Maybe with a little sauerkraut?) Ok, only joking (kind of), back to the dinner at hand. Meat and potatoes. Grilled Flank Steak and Yogurt Mustard Mashed Potatoes to be exact. I didn't add anything to the flank steak apart from a little salt and those cool criss cross lines. I served the steak and potatoes with a simple mango salad tossed in lime juice. Easy!


Yogurt Mustard Mashed Potatoes
5-6 medium sized potatoes
1 tsp Garlic
1 Tbsp Stone Ground Mustard
2 stalks of Green Onion
1 cup of Cheese (I used swiss)
1 cup of Plain Yogurt
1/2 cup crushed Crackers (I used whole grain Ritz)
1/4 stick of Butter (yes, Ed, I'm Sorry!)
a drizzle of Olive Oil
Salt and Pepper


Yogurt Mustard Mashed Potatoes Directions
Cut potatoes in cubes and boil in water on the stove top until cubes are soft and break apart easily. Drain water and return to pot. Add yogurt, butter, garlic, mustard, salt and pepper. Mix until you reach your preferred consistency. Stir in the green onions and 3/4 of the cheese. Transfer mashed potatoes to an oven safe dish. Top with the rest of the cheese and all of the crackers. Drizzle with Olive Oil. Bake in the oven at 350 for 15-20 minutes.

Flank Steak Ingredients
Flank Steak
Salt


Flank Steak Directions
Grill steak on a grill pan several minutes on both sides until the meat is how you like it. I prefer well done. Ed's likes it barely seared...


Ed's Verdict: He loved these mashed potatoes! And I am so glad because he is not a huge potato fan, but we got about 20 potatoes in our WGG box this week, so I had to fix them. He was a good sport to let me make mashed potatoes, and I'm glad he ended up really liking them. This recipe is a keeper.

Friday, February 11, 2011

Grandma Thornton's Chocolate Meringue Pie


As a kid, every time I went to visit my Grandma Thornton, I would beg her to make Chocolate Meringue Pie. It was my favorite. I hadn't had it in forever and when she was in town a few weeks ago, I asked her to make it for me. However, this time, instead of getting to work in the kitchen, she gave me the recipe with the hope that I would be able to accomplish it myself. I figured I was ready for the challenge, but it is actually not an easy recipe. In fact, if I'm going to be entirely honest, I had to make it twice. For my first attempt the filling did not set up right and the pie ended up a big chocolate soup. Although I had no idea what went wrong, I was determined to get it right. I headed back to the market to purchase all of the ingredients again to give it another try. The second time was a success! The pie turned out just as perfect as I always remembered it to be. I have no idea what I did wrong the first time, but that just goes to show how delicate this pie recipe is. If you are brave enough to try it, I promise once you get it right, you won't regret the work. 

Ingredients
3/4 cups Sugar
5 Tbsp Baking Cocoa
3 Tbsp Cornstarch
1/2 tsp Salt
2 cups Milk
3 Eggs, separate the yolks and whites
1/4 tsp Cream of Tarter
6 Tbsp Sugar (for the Meringue)
1 Pie Shell

Directions
In a sauce pan, mix 3/4 cups of sugar, cocoa, cornstarch, and salt. Gradually add the 2 cups of milk. Cook on medium-high heat stirring constantly until the mixture becomes thick and bubbly. Reduce heat and continue to cook and stir for 2 additional minutes. Remove from heat. In a separate bowl, fluff 3 egg yolks. Take 1 cup of the chocolate filling and mix it in with the egg yolks. Return to sauce pan and bring to a gentle boil. Once the mixture has reached a boil, continue to cook for 2 additional minutes. Remove from heat and stir in vanilla.

When I have the time, I make my own pie crust. However, I am a big fan of the Pillsbury Refrigerated Pie Crusts. They taste homemade and are great if you are crunched for time or don't feel like messing with homemade. If using pre-made pie crusts, unroll the dough into the pie pan and bake the crust according to the instructions. I like to experiment with various types of decorative pie crust crimping. My favorite is the fluted pinched edge. After the pie crust has been baked, remove it from the oven and pour in the hot chocolate filling. Next we move on to the meringue.

 Creating this tenuous topping is a precarious task best left to experienced bakers. Since in my case I didn't have much of an option, I just had to jump in and trust the recipe. First you start by beating the egg whites and cream of tarter with a hand mixer for quite a long, long time until soft peaks begin to form. Gradually add the 6 tablespoons of sugar and continue to beat the mixture until it becomes stiff and glossy. This can take a little bit of patience and some knowledge of meringue chemistry. The quality of your meringue can be affected by the age and quality of the egg and even the temperature outside! But stick with it. Every meringue I have made (which isn't very many) has came out just a little different. Once you have reached a meringue-like consistency, spread it out evenly over the hot chocolate filling sealing the meringue to the pie crust.

 Bake the pie at 350 for about 15 minutes taking care to not burn the meringue top. My grandma suggests getting a chair and placing it in front of the oven and watching it, turning it slightly if one meringue tip starts to brown unevenly. This was nearly impossible for me to do with two little kids, but I think I prefer the irregularity of a uneven meringue. It gives the pie a bit of personality.
Ed's Verdict: Sometimes I make things just for myself. This was pretty much one of those times. Ed had a piece and thought it was good. However, I will admit that over the course of the next three days, I ate the entire rest of the pie all by myself. It tasted so gratifyingly rich and familiar, I couldn't stop myself from eating it.  

Tuesday, February 8, 2011

Hawaiian Chicken and Coca-Cola Quinoa


I decided on Hawaiian Chicken based on the fact that I had all of the ingredients. I love the way pineapple, red peppers, and cilantro taste together. This dish is simple and fast. As for the Coca-Cola Quinoa, well, I'm pretty sure I might be the only person in the universe who has ever made that dish before. But it is very good and the coke gives the quinoa a sweet flavor. For those of you who have never cooked with quinoa, it is a pseudocereal native of the Andean Mountain region. I used black quinoa, which has a rich, nutty taste. It's a great alternative to rice or couscous and is normally found in the health food section of any major chain grocery store. I have to give credit to my mother-in-law for the idea of cooking it in coke. She is the only person I have ever seen cook rice in Coca-cola. I figured it would probably taste just as good in quinoa. This idea gives way to so many other non-typical combinations: Red Wine Rice? Pale Ale Couscous? Imagine the possibilities...


Hawaiian Chicken Ingredients

2 Chicken Breasts
1 can of crushed Pineapple
1 Red Pepper, chopped
1 bunch of Cilantro, chopped
1 hand full of Crackers, crushed
1 drizzle of Olive Oil
salt and pepper

Hawaiian Chicken Directions
Pre heat oven to 350 degrees. Add chicken to an oven safe dish. Top chicken with pineapple, red peppers, cilantro, and crackers crumbs. Salt and pepper to taste and drizzle with olive oil. Put it in the oven for 30-45 minutes or until chicken reaches internal temp of 165.


Coca-Cola Quinoa Ingredients

1 cup of Black Quinoa
2 cups of Coca-Cola
3 stalks of Green Onion, diced
1 bunch of Cilantro, chopped
1 medium Tomato, diced
salt

Coca-Cola Quinoa Directions
Pour 2 cups of Coke into a pot and bring it to a boil. Add quinoa and return to a boil. Cover and turn the flame to low. Cook for 15 minutes or until liquid has been absorbed. Once the quinoa is done, add the remaining ingredients.


Ed's Verdict: Actually I have to be honest. Ed hates the idea of cooking anything in Coca-Cola. Neither one of us drink the stuff, but we happened to have some left over from a certain 4 year-old's birthday party. I hated to throw it out, so it's been sitting unopened in our garage. I remembered that his mom used to cook rice with it, and I couldn't help but wonder what it would taste like with quinoa. Before Ed realized what was in it, he loved it and thought it was fabulous. After I reveled to him the ingredients, he was less than amused. He has made me promise not to cook anything with coke in it again. Apparently its too non-cavemen/migraine causing. I think Ed's diets are stifling my creativity...

Saturday, February 5, 2011

Colombian Hot Chocolate

Breakfast in Colombia can be a very gluttonous affair. Arepas, pandebono, almojabanas, and even this dish. But a traditional staple commonly present at the Colombian breakfast table is Hot Chocolate. I'm not talking about Swiss Miss. This is the real deal. Large chunks of decadent, flaky chocolate with cinnamon and clove undertones cut into small squares and infused into warm milk by ways of an aluminum pitcher called a chocolatera. It is brought to a froth not with a whisk but a special wooden stirring stick called a molinillo. There is developed art to making Colombian Hot Chocolate. It takes a little patience and a careful eye as to not let the chocolate boil over (as often happens to me, I will admit).
We are lucky enough to find the packages of chocolate sold at the Colombian market in Arlington. But because even Arlington seems like a day's trek away, we reserve Chocolate for the weekends and serve it with fresh, warm bread from a local bakery. It is important to note that Colombians traditionally cut up fresh cheese to put into the chocolate, a concept not quite convincing to outsiders. (Although I have been fully converted). When I asked Ed why Colombians put cheese in their hot chocolate he simply replied, "It's not a matter of why, but why not."

Ingredients
2 squares of chocolate per 1 cup of milk
Fresh Bread
Fresh Cheese

Directions
Pour milk into the chocolatera. Add chocolate squares. Mix with the molinillo (or whisk if you dont have a molinillo) until chocolate becomes a chocolaty, frothy yumness. Pour into mugs and serve with bread and cheese.


Ed's verdict: He specially requested Hot Chocolate for breakfast and brought home this fresh bread (a serious diversion from his paleolithic diet!) I could tell that he was especially jonesing considering he went out at 8AM to buy more milk...

Mexican Squash and Ground Beef Casserole

Butternut squash is a very common occurrence in my Washington Green Grocer's box. Due to it's frequent appearance, I went in search of a fresh and interesting way to prepare it. Butternut squash soup is delicious, but I was looking for something a bit more arresting. We were expecting dinner guests (La Familia Pas), and I didn't want to spend too much time in the kitchen. I did, however, want something that would surpass Chinese take out. I found this fabulous squash and ground beef casserole recipe on food.com, and it fit the bill perfectly.

The recipe is quick and easy. The most difficult part was chopping up the squash. My advice is to use a sharp knife and have a strong man on standby ready to take over just in case. The addition of taco-like spices such as cumin and chili powder give the dish a definite southwestern flare. Once all of the ingredients have been tenderized on the stove top, the casserole is baked in the oven for 15 minutes creating a melted cheesy goodness that caps the dish. I chose to serve this with white rice, homemade guacamole, and tortilla chips. I think it really added to the Mexicaness of the plate.

Growing up in my family, butternut squash was not a regular staple at our dinner table. But as these dulcet, nutty fruits (yes, fruits!) become more common in my kitchen these days (thanks to WGG), I have become more comfortable cooking with it. Butternut squash is a delicious and versatile plant full of vitamins and tastiness. I highly, highly recommend this recipe for you and your family to try!


Ingredients

1 lb Ground Beef
1 Tbsp Oil
1 Butternut Squash, chopped
3 Green Onions, chopped
1 Garlic Clove, minced
1 pint Fresh Tomatoes, diced
1/2 cup Water
1 tsp Chili Powder
1 tsp Cumin
1 tsp paprika
salt and pepper
1 cup Mexican Shredded Cheese
Cilantro as garnish, chopped


Directions

Brown the ground beef in a skillet. Once it has been thoroughly cooked, drain and set aside in a separate dish. In the same skillet, add the oil, squash, onions, and garlic and cook until the squash is tender. Then return the ground beef to the skillet and add in the diced tomatoes, water, and spices. Mix well and then move the mixture to an oven proof casserole dish. Cover with lots of cheese and sprinkle chopped cilantro on top. Cook in the oven at 400 for 15 minutes.


Ed's Verdict: Ed was annoyed that he had to share it, and therefore there were no leftovers.

Guest Verdict from Elise and Aaron: I think they really enjoyed it. Elise said it was really great, and she definitely went back for seconds (therefore see Ed's verdict...)


Thursday, February 3, 2011

Chicken Tikka Masala


I've been cooking my own Indian food for a few years now. People are always impressed that I make my own Indian dishes at home, but to me it's not too much more time consuming or difficult than making spaghetti. But maybe it's because I don't make it "the right way". I don't know if I do or not because I essentially made up my Chicken Masala and Paneer Masala recipes. I just kind of follow my gut and my palate and go for it.

But if you are interested in making it a little more complicated, I have been known to make my own paneer (cheese). That can easily replace the chicken in this dish. It's actually pretty easy, and it saves you $$$ from buying expensive paneer in the stores. Tonight, though, I made this dish with Chicken. Making your own paneer does take a little bit of pre-planning and is not possible when you are searching for last minute dinner ideas.


Ingredients
2 Chicken Breasts, cut into chunks
1 Tbsp Butter
1/2 medium Onion, chopped
1/2 Red Pepper, chopped
1 tsp Garlic, chopped
1 tsp Ginger Paste
1 can Tomato Paste
1 cup Plain Yogurt
2 Cloves
2 Cardamom Pods
1 small stick of Cinnamon
2 Tbsp Garam Masala
2 tsp Cumin
1 Tbsp Lemon Juice
1 tsp of sugar
salt and pepper
Garnish with Cilantro or Mint


Directions
Add butter, onion, cloves, cardamom pods, and cinnamon into a large saute pan. Heat for a few minutes and then add the Chicken pieces. As the chicken is cooking, add the red pepper, garlic, and ginger. At this point, I go ahead and start adding a majority of my spices in order to give a little flavor to the chicken. Once the chicken is thoroughly cooked, add the tomato paste (In the summer when my garden has an abundance of tomatoes, I make my own tomato puree which is much more flavorful. However, its January and canned tomato paste is fine. Fine.) Then add the yogurt, lemon juice, and any remaining spices that you failed to add above. Then I add a little bit of sugar or sucanat. I don't think any real Tikka Masala dishes call for sugar, but I have this need to add sugar to any tomato base recipe. Probably the result of years of eating my mother's cooking (see previous post).

Anyhow, now is probably a good time to dip your finger in the pan and taste the concoction to see if it may need to be tweaked to meet your specific Indian taste preferences. A little more cumin? A pinch more garam masala? Maybe you want to make it super spicy and add one of these. Whatever you want. It's your homemade Indiana dish. I normally garnish with cilantro or mint leaves, but I, again, seeing as it is January, didn't have any fresh off hand from the garden. Thus we had to do without. It was still pretty good, though.


The above picture is just after the yogurt was added. Mix the yogurt in throughly. I even sometimes add a little whole milk if it gets too thick. Once its done, serve over rice. Sometimes I make Indian Rice such as this or that. But tonight Ed wanted regular Basmati rice with just a little Olive Oil and Salt, and I obliged. You can take the Colombian out of Colombia but you probably shouldn't really mess with his rice too much.


Ed's Verdict: Ed loves Indian food and always enjoys when I make it. And just for memory sake... ahhhhh reminecent of a trip taken exactly two years ago this month!


Finally, just for fun I'm adding our dessert. We had Vanilla Cake with Chocolate Frosting courtesy of Betty Crocker (and a certain very helpful in the kitchen 4 year old wannabe baker.) Click here for some ideas on jazzing up a boxed cake!